Wednesday, April 1, 2009
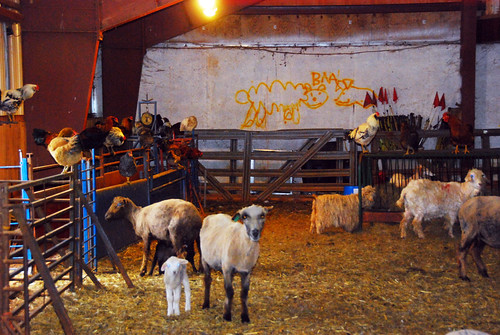
Class#6 Mangham Manor Wool and Mohair Farm Visit
Tuesday, March 24, 2009
A Library Gem- 'In A Nutshell'
Wednesday, March 18, 2009
Class #5: Stamping and Stenciling on Scrap Wood
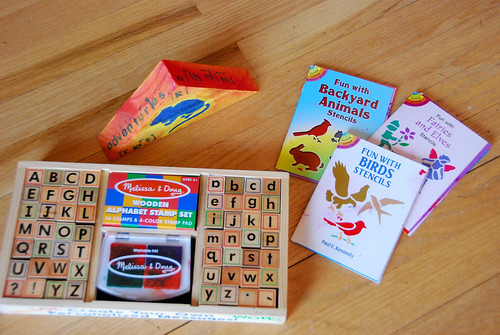
My husband, Jason Roberson, supplied us with a box full of wooden triangles, which were cast-offs from a recent carpentry project. The kids painted the triangular "mountains" with tempera paints and then stenciled them with various Birds, Backyard Animals, and Fairies and Elves stencils from Dover. They also stamped onto the "mountains" with a Melissa and Doug stamp kit. We lined up all the creations to make a mini mountain range.
The wooden pieces do not need to be primed for this project. The wood takes the tempera paint and stamping very well. If you want to paint wood pieces to use as a toy, I recommend sealing the wood with melted beeswax after painting and stamping.
Wednesday, March 4, 2009
Class #3- Fun with Eggs!
Inside I demonstrated the strength of an egg-shell. What you do is hollow out four eggs and put the halves on a flat surface, you can then put several very heavy books on top of the four shells without them breaking. Even though the shell are thin the shape of the dome of the egg is structurally sound. This allows the mother hen to sit right on her eggs for 22 days straight.
At the end of the class the children had two books to choose from: an Egg is Quiet by Aston and Long or So Happy by Henkes and Lobel. They chose So Happy because of its breathtaking Van Gogh-like illustrations.
Tutorial: How to Make Egg Shakers
We made egg shakers for our craft project. Here's what you need: eggs, strong tape, colored tissue paper, lentils, spoons, brushes, and white glue diluted with water.
1) Have an adult put a small hole with a sterilized nail into the egg and open the hole until you are able to shake out the insides. Save the insides for later to make an omlett. Rinse out emptied shell and pat dry.
2) Use a teaspoon to half fill the egg shell with dried lentils.
3) Cover hole up with masking tape.
4) Cover egg completely with white glue and water mixture. You can brush it on or dip the egg into the mixture.
5) Rip pieces of colored tissue paper and smooth them onto the egg. You can keep adding glue and paper, layering and smoothing carefully as not to crush the egg.
6) Leave the now colorful egg overnight to dry. In the morning it will be hardened like paper-maché and you'll have a new musical instrument!
Sunday, February 22, 2009
Happy Sunday!
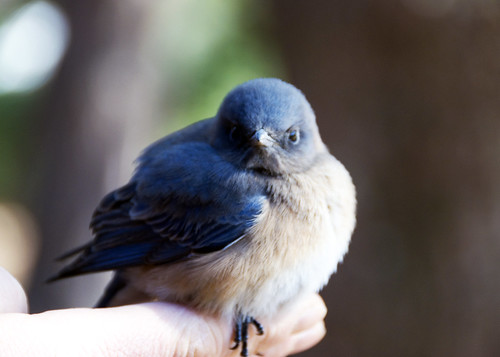
Hello, I hope you had a wonderful weekend! I photographed this little blue bird today. My husband found it trapped in the wood stove in his shop. It stayed on his hand for a good fifteen minutes before it decided to fly off to the nearest branch.
Saturday, February 21, 2009
Class #2 Garden Design and Early Planting
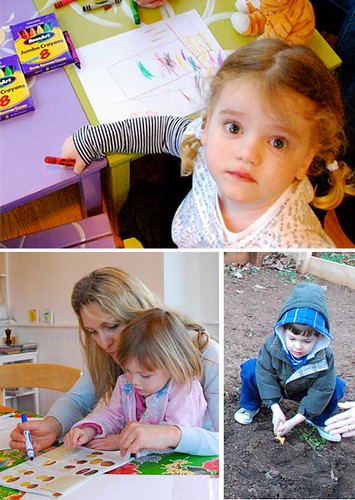
On Thursday February 19th we had our second Adventures with Mimi class. We started off by having the children design their own gardens. I explained that when it comes to gardening and growing things, now is a great time to start planning and buying seeds. Parents first drew maps of their back yards or patios and then the children filled in the maps with their own imaginative garden plans. They got some great ideas from the Seeds of Change catalog, which is full of heirloom varieties such as, purple potatoes, red carrots, and yellow watermelons. I was inspired to write a song about gardening to teach the children; it goes like this:
My Favorite Garden
My favorite things to eat are veggies in the garden
My favorite things to smell are flowers in the yard
Everything is blooming all the colors in the rainbow
growing from the soil below
My favorite things to hold are seeds and to plant them
My favorite things to watch are seeds when they grow
Everything is growing all the colors in the rainbow
growing from the soil below
My favorite things to catch are bugs in the garden
My favorite place to hide is in the garden too
Everything is growing all the colors in the rainbow
growing from the soil below
My favorite one to help is mommy in the garden
My favorite job to do is water all the plants
Everything is growing all the colors in the rainbow
growing from the soil below
After the drawing exercise, we went outside to plant seeds that tolerate frost and are meant to be planted early: radishes, snow peas, and spinach. Kate Bennis has a very nice raised bed, ready and waiting to be a fabulous vegetable garden. In the raised bed, kids got to dig in the dirt, find earthworms, and plant seeds. We sanitized our hands afterwards because of the horse manor. We got chilly, went inside where Kate made everyone some hot chocolate to warm up. While enjoying a warm drink I read to the children a stunningly beautiful book called A Seed is Sleepy by Aston and Long. I see these authors also have an egg book, which I must find!
Thursday, February 12, 2009
Class #1 'Here in Virginia'
Hooray! We had the first class today. It has been a long time in the making and I am so excited that it has finally begun. Kate Bennis helped to organize and she will host several sessions at her lovely home.
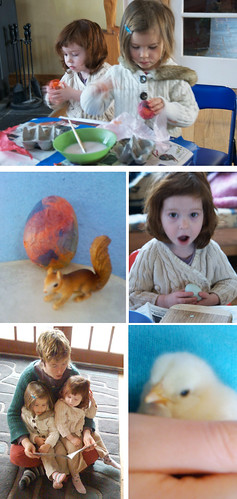
Children and moms began to trickle in at 4:00pm. Shy toddlers, clinging to their moms immediately opened up when a fluffy yellow chick was placed in their hands. I'm glad that I was able to show this wonderful creature to them.
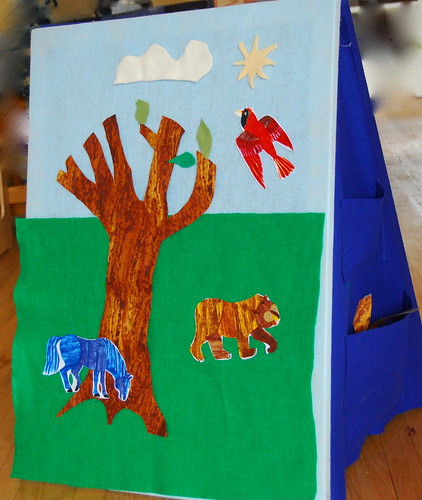
We had a scavenger hunt outside, where Eric Carle cloth animals were hidden around the yard. Each child got a magnifying glass to search around and find 'Brown Bear, Brown Bear' hiding in a tree or 'Blue Horse, Blue Horse' hiding in the garden.
Next we brought all the little cloth animals inside and gathered around the felt board. Elements were added to the board as they came up in the story. The children got to help and participate in the telling. Here's how the story went:
Here in Virginia we have a lot of sunshine. Sometimes the shy is clear and blue. Sometimes it is a bit cloudy. Here in Virginia, our mountains look blue! We call them the Blue Ridge Mountains. Here in Virginia we have pine forests.We have hardwood forests too. Here is an oak tree that lives in the forest. In the winter it has no leaves, but in the spring it sprouts lots of green leaves! Many animals, reptiles, and birds live in the forest. We have cardinals, which are the Virginia state bird. We have bears! Oh, yes. In Virginia forests there are frogs too. They like to be in places that are nice and damp. Some animals in Virginia don't live in the forest, but they love to visit it. Here in Virginia, we have cats, horses, ducks, fish, and people!
After the story-time we had craft-time. Children got to make their very own felt boards. They were supplied with felt pouches and an abundance of wool and cotton fabric scraps for cutting and arranging shapes onto the felt. Beautiful compositions were created. The best part was that this was virtually a mess free activity. The fabric scraps stick right to felt without glue or velcro, in fact, they stick right to peoples' clothing as well. In the end, everyone got a pocket full of fabric pieces to take home. They can always add to their felt object collection with new fabric pieces to make all different temporary pictures.
Wednesday, February 11, 2009
Tutorial: How to Make a Felt Board
What you need:
- 4 26" canvas stretchers
- 4 32" canvas stretchers
- Staples and heavy duty staple gun
- scissors
- 2 yards of felt (1 yard in light blue 1 yard in dark blue)
- 2 2" long hinges and screws (need a screw-driver to attach hinges)
- Thread to match the felt and a sewing machine
- 2 yards lightweight fusible interfacing
- Assemble your stretchers so that you have two 26" by 34".
- Cut the felt so that you have about 1.5" extra all around.
- Use you heavy duty staple gun and staple the felt around the stretcher, like you would a canvas. Start in the middle of the bars, going around, end with the corners. The felt should be taught and even all around.
- Attach the hinges on the back side of the stretched felt boards, across the 26" side.
- Cut two triangles 23" across the bottom and 36" tall. Cut straight across the tops of the triangles 2" down so they have flat tops.
- Cut Pockets: 2 6"X6" 2 11"X9"
- Sew pockets onto side triangles, one big and one little onto each side
.
- Staple side triangles to the backside of the felt boards. This part is a bit tricky, pinning first may help. Use something to prop up the felt board while it is on its side. Staple as close to the edge as possible, with staples about 1" apart.
- Use your imagination and make objects to stick onto the board. You can use the them to tell a story or children can make up their own.
- If you are using quilters' cottons, you can iron-on lightweight interfacing onto the back to give the fabric more support and prevent fraying.