Showing posts with label nature. Show all posts

Tuesday, March 24, 2009

A Library Gem- 'In A Nutshell'

I found some great books at the library this week while browsing through the stacks. I plan to review some of them and I'll let you know how the kids respond to them. Today I enjoyed reading a very special book to kids in my Parent and Me Nature Explorers class at Pen Park.

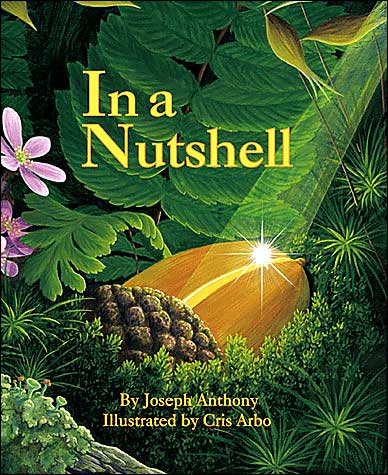
Whenever I pick up a book from the children's book publisher Dawn Publications, I know I am in for an educational, earth loving treat. The book In a Nutshell by Joseph Anthony and Cris Arbo really takes my breath away. It details the entire life cycle of an acorn. The nut falls from an oak tree and survives many perilous situations as it sprouts and grows into a huge tree that is enjoyed by animals and humans alike. It dies, turns to soil, and delicious things grow from that soil that become part of us all. The story is deep, yet thoroughly enjoyable to read and with amazing illustrations. The children enjoyed pointing out recognizable plants and animals. I could see this story being read again and again because it is so rich.

Tuesday, March 10, 2009

Seed Starting and Swapping

Two weeks ago my friends Alp and Ingrid hosted a Seed Swap Party. It was so cleverly organized. Everyone brought their seeds and there were little baggies to put them into for trading. I now have the most eclectic mix of seeds and a compendium of knowledge about gardening from my green-thumbed friends. A seed swap is a great way to get heirloom varieties and learn what does well in your area.

Now my little seedling are starting to sprout; it is a very exciting time. I made all their little starter pots out of recycled newspaper using this nifty little wooden gadget called a Pot Maker. I used Fox Farm brand potting soil which contains earthworm castings and bat guano.

Sunday, February 22, 2009

Happy Sunday!

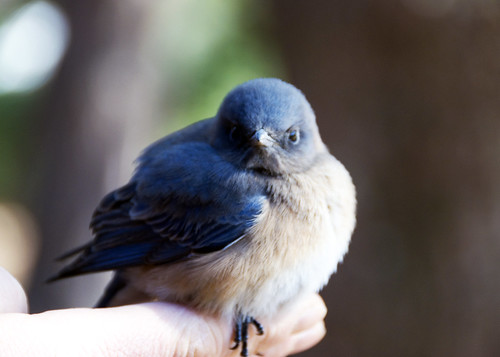
Hello, I hope you had a wonderful weekend! I photographed this little blue bird today. My husband found it trapped in the wood stove in his shop. It stayed on his hand for a good fifteen minutes before it decided to fly off to the nearest branch.

Saturday, February 21, 2009

Class #2 Garden Design and Early Planting


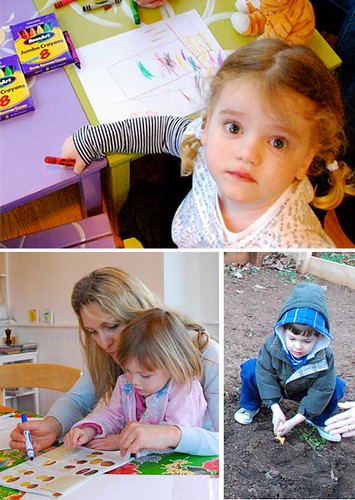
On Thursday February 19th we had our second Adventures with Mimi class. We started off by having the children design their own gardens. I explained that when it comes to gardening and growing things, now is a great time to start planning and buying seeds. Parents first drew maps of their back yards or patios and then the children filled in the maps with their own imaginative garden plans. They got some great ideas from the Seeds of Change catalog, which is full of heirloom  varieties such as, purple potatoes, red carrots, and yellow watermelons. I was inspired to write a song about gardening to teach the children; it goes like this:

My Favorite Garden

My favorite things to eat are veggies in the garden

My favorite things to smell are flowers in the yard

Everything is blooming all the colors in the rainbow

growing from the soil below

My favorite things to hold are seeds and to plant them

My favorite things to watch are  seeds when they grow

Everything is growing all the colors in the rainbow

growing from the soil below

My favorite things to catch are bugs in the garden

My favorite place to hide is in the garden too

Everything is growing all the colors in the rainbow

growing from the soil below

My favorite one to help is mommy in the garden

My favorite job to do is water all the plants

Everything is growing all the colors in the rainbow

growing from the soil below

After the drawing exercise, we went outside to plant seeds that tolerate frost and are meant to be planted early: radishes, snow peas, and spinach. Kate Bennis has a very nice raised bed, ready and waiting to be a fabulous vegetable garden. In the raised bed, kids got to dig in the dirt, find earthworms, and plant seeds. We sanitized our hands afterwards because of the horse manor. We got chilly, went inside where Kate made everyone some hot chocolate to warm up. While enjoying a warm drink I read to the children a stunningly beautiful book called A Seed is Sleepy by Aston and Long. I see these authors also have an egg book, which I must find!

Thursday, February 12, 2009

Class #1 'Here in Virginia'

Hooray! We had the first class today. It has been a long time in the making and I am so excited that it has finally begun. Kate Bennis helped to organize and she will host several sessions at her lovely home.  

Children and moms began to trickle in at 4:00pm. Shy toddlers, clinging to their moms immediately opened up when a fluffy yellow chick was placed in their hands. I'm glad that I was able to show this wonderful creature to them.

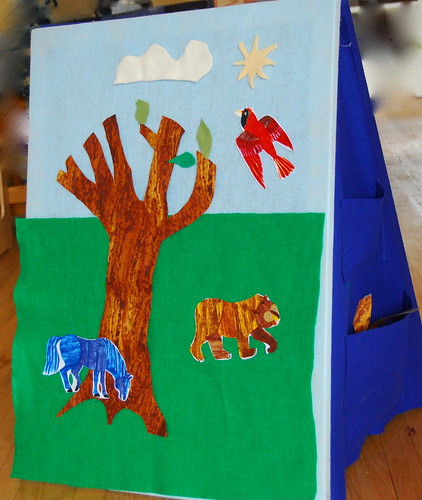
We had a scavenger hunt outside, where Eric Carle cloth animals were hidden around the yard. Each child got a magnifying glass to search around and find 'Brown Bear, Brown Bear' hiding in a tree or 'Blue Horse, Blue Horse' hiding in the garden.

Next we brought all the little cloth animals inside and gathered around the felt board. Elements were added to the board as they came up in the story. The children got to help and participate in the telling. Here's how the story went:

Here in Virginia we have a lot of sunshine. Sometimes the shy is clear and blue. Sometimes it is a bit cloudy. Here in Virginia, our mountains look blue! We call them the Blue Ridge Mountains. Here in Virginia we have pine forests.We have hardwood forests too. Here is an oak tree that lives in the forest. In the winter it has no leaves, but in the spring it sprouts lots of green leaves! Many animals, reptiles, and birds live in the forest. We have cardinals, which are the Virginia state bird. We have bears! Oh, yes. In Virginia forests there are frogs too. They like to be in places that are nice and damp. Some animals in Virginia don't live in the forest, but they love to visit it. Here in Virginia, we have cats,  horses, ducks, fish, and people!

After the story-time we had craft-time. Children got to make their very own felt boards. They were supplied with felt pouches and an abundance of wool and cotton fabric scraps for cutting and arranging shapes onto the felt. Beautiful compositions were created. The best part was that this was virtually a mess free activity. The fabric scraps stick right to felt without glue or velcro, in fact, they stick right to peoples' clothing as well. In the end, everyone got a pocket full of fabric pieces to take home. They can always add to their felt object collection with new fabric pieces to make all different temporary pictures.

Wednesday, February 11, 2009

Tutorial: How to Make a Felt Board


I created this felt-board especially for the 'Adventures with Mimi' nature class. This felt-board pattern stands on its own, is lightweight, collapsable and has pockets on the side to store your objects. Make one side with light blue felt for daytime scenes and the other side with dark blue felt for nighttime scenes. You can make a custom felt board with whatever shapes you can dream up. Quilters cotton, fleece, and wool, sticks right to the felt without velcro. You can cut the shapes out from solid fabrics or buy printed fabric with pictures to cut out. I bought a yard of Eric Carle's 'Brown Bear, Brown Bear' fabric and cut out all the different animals. I made leaves for trees out of wool sweater scraps. 

What you need:

  • 4 26" canvas stretchers
  • 4 32" canvas stretchers
  • Staples and heavy duty staple gun
  • scissors
  • 2 yards of felt (1 yard in light blue 1 yard in dark blue)
  • 2 2" long hinges and screws (need a screw-driver to attach hinges)
  • Thread to match the felt and a sewing machine
  • 2 yards lightweight fusible interfacing 
  1. Assemble your stretchers so that you have two 26" by 34".
  2. Cut the felt so that you have about 1.5" extra all around.
  3. Use you heavy duty staple gun and staple the felt around the stretcher, like you would a canvas. Start in the middle of the bars, going around, end with the corners. The felt should be taught and even all around.
  4. Attach the hinges on the back side of the stretched felt boards, across the 26" side.
  5. Cut two triangles 23" across the bottom and 36" tall. Cut straight across the tops of the triangles 2" down so they have flat tops.
  6. Cut Pockets: 2 6"X6" 2 11"X9"
  7. Sew pockets onto side triangles, one big and one little onto each side.
  8. Staple side triangles to the backside of the felt boards. This part is a bit tricky, pinning first may help. Use something to prop up the felt board while it is on its side. Staple as close to the edge as possible, with staples about 1" apart.
  9. Use your imagination and make objects to stick onto the board. You can use the them to tell a story or children can make up their own. 
  10. If you are using quilters' cottons, you can iron-on lightweight interfacing onto the back to give the fabric more support and prevent fraying.