Here are Cous Cous (the little one) and Quimble (the big one). They are meeting for the first time and to my pleasant surprise they get along great! The full grown chickens are a little less welcoming, but I will be easing these two into the flock little by little. Every day is an adventure with chickens. Becoming a chicken keeper is one of the best decisions that I have ever made. If anyone reading this blog is interested in getting a backyard flock of their own, I say "do it!". They are fun, useful, and low maintenance pets, not to mention the eggs are phenomenal. I just joined a local Charlottesville organization called C.L.U.C.K (Charlottesville League of Urban Chicken Keepers). Isn't that just the best acronym ever? They have a blog and a facebook page so you can join this lively group of poultry enthusiasts.
Wednesday, March 18, 2009
Wednesday, March 4, 2009
Class #3- Fun with Eggs!
Inside I demonstrated the strength of an egg-shell. What you do is hollow out four eggs and put the halves on a flat surface, you can then put several very heavy books on top of the four shells without them breaking. Even though the shell are thin the shape of the dome of the egg is structurally sound. This allows the mother hen to sit right on her eggs for 22 days straight.
At the end of the class the children had two books to choose from: an Egg is Quiet by Aston and Long or So Happy by Henkes and Lobel. They chose So Happy because of its breathtaking Van Gogh-like illustrations.
Tutorial: How to Make Egg Shakers
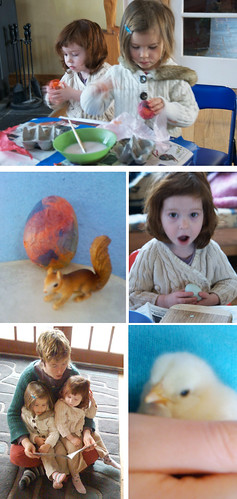
We made egg shakers for our craft project. Here's what you need: eggs, strong tape, colored tissue paper, lentils, spoons, brushes, and white glue diluted with water.
1) Have an adult put a small hole with a sterilized nail into the egg and open the hole until you are able to shake out the insides. Save the insides for later to make an omlett. Rinse out emptied shell and pat dry.
2) Use a teaspoon to half fill the egg shell with dried lentils.
3) Cover hole up with masking tape.
4) Cover egg completely with white glue and water mixture. You can brush it on or dip the egg into the mixture.
5) Rip pieces of colored tissue paper and smooth them onto the egg. You can keep adding glue and paper, layering and smoothing carefully as not to crush the egg.
6) Leave the now colorful egg overnight to dry. In the morning it will be hardened like paper-maché and you'll have a new musical instrument!