Thursday, July 30, 2009

Bugs! An Insect Related Craft Project for Kids


bugs!, originally uploaded by Loopy Dolls.

I've made these bugs with children ages 2-9 and they have all enjoyed this project. Using only black and glitter paint gives the bugs a nice unified result.

The kids (ages 3-5) made these adorable bugs last week. Here's how we did it:

  • Materials Needed:
  • Crayola Model Magic
  • pipe cleaners cut into quarters
  • Googly Eyes
  • White Glue
  • Black Tempera Paint
  • Sparkly Siver Tempera Paint

Directions:
Make three balls with the Model Magic; these are for the head, thorax, and abdomen. Stick the balls together. Stick the pipe cleaners right into the clay. Paint your bugs with sparkly black paint. Finally, glue the googly eyes into place. 

Crayola model magic is neat stuff. I'm a huge fan. You can paint it and even draw on it with markers while it is still wet. It is not messy at all. It dries completely in about 15 hours.

Popcorn- A Healthy Snack Idea


popcornherbs, originally uploaded by Loopy Dolls.

I've started incorporating healthy snacks into my class itineraries. It has been great sharing treats from my garden such as, sugar snap peas and cherry tomatoes. Hard boiled eggs from my chickens have been a success as well. Last week I made some stove top popcorn and brought different herbs from the garden. The children tasted and smelled the different herbs, learned their names, then we chopped them up and sprinkled them all over the popcorn with salt and pepper... Yum!

Thursday, July 23, 2009

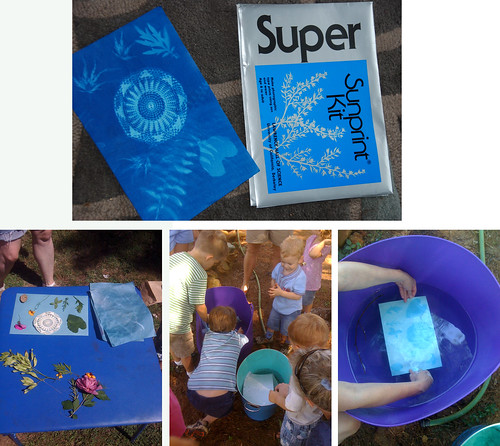
Tutorial: Make a Cyanotype

I think that this is one of the most elegant craft projects that you can do with young children: no paste, no waste. The finished product is a sophisticated and framable photographic blueprint of your child's nature findings and compositional intuition.

What You Need:
Directions:
  1. Place Sunprint paper, blue side up, onto a piece of cardboard.
  2. Arrange your objects (leaves, doilies, keys, flowers, etc...) to your liking.
  3. Place acrylic sheet over top to hold arrangement down and move the sandwiched paper to a very sunny spot.
  4. Watch as the paper fades to almost white (1-5 minutes).
  5. rinse Sunprint paper in water for about a minute and let dry. As it dries the paper will turn dark blue, but the places where the objects were will stay white.

Wednesday, July 8, 2009

Albino Fawn

On my to a workshop at a flower farm in Keswick Virginia, I spotted this albino fawn, while driving in my car. It was about 10 yards away, but luckily I had my trusty Nikon with its 12x zoom lens. The mystical baby creature seemed to be all alone. I have seen one other albino deer in my life. There used to be a white buck that lived in the woods by my house. I was always thrilled to spot it and consider it to be good luck. Below is a painting that I did in honor of albino deer. Ooh, that gives me an idea; make an albino deer LoopyDoll, yeah!

Dendrochronology


Dendrochronologists study the age and history of trees by counting and observing tree rings. Well, we didn't count all the rings of this giant oak tree, but can guess that it is far older than any of us. The children enjoyed using their magnifying glasses to look at all the ants, plants, and life that still existed on this fallen tree near Pen Park. Now this is incredible: while we were examining the tree we found a necklace in it- yes, the tree had engulfed it, amazing! 

Library Gem
It turns out that one of my all time favorite authors, Margaret Atwood, also write the occasional kids book. She wrote, illustrated Up in the Tree and set the type. Ms. Atwood is my hero! This book was great to read out-loud to the kids. They giggled at many of the pages and had me read it twice- always a good sign!

Tuesday, June 16, 2009

A Visit with My Twin Niece and Nephew


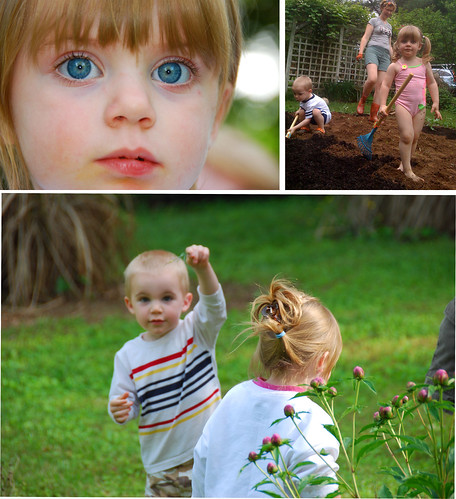
My 2.5 year old niece and nephew visited for a week in May. They are real nature lovers; we had a blast going to parks, swimming, feeding the chickens, playing with the cat and dog, and gardening. They were such good little helpers in the garden! I ordered 4 cubic yards of compost from Panorama Paydirt and they helped me spread it all around... Emily has the most amazing eyes- O.M.G. she is stunning!

Back to the Blog with Pond Portraits


Thank you so much to the reader who prompted me to keep posting! It has been a very long time since I've posted and now I must catch up on two months worth of nature adventures that I've been having. I've been spending time teaching nature classes to toddlers and their parents, gardening, working on a farm, and relaxing by my little fish pond. The pond is such an amazingly thriving ecosystem. We have gold fish, frogs and flowering waterlillies. Every year these forest toads come to mate, lay eggs, and next thing we know the pond is wriggling with tadpoles, which metamorph into these teeny tiny toads that are only about one centimeter long. 
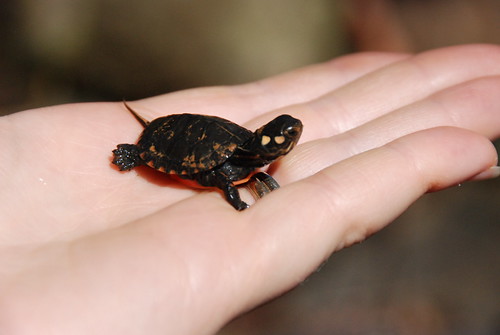
I found this tiny hatchling around the neighborhood pond and was hoping that it would take up residence at my little water feature. It swam around a while, but didn't want to stick around, so I returned it to its home. Just as well, he would have grown large and eaten all the fish.  

Craft Show Spectacular


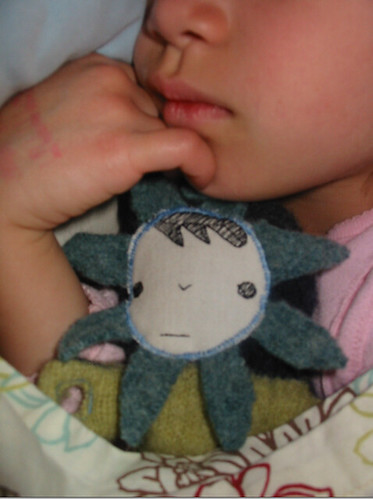
The Spring Bada Bing show in Richmond was such a blast. I just adored my fellow vendors and hope to do more shows like it in the future. I was especially tickled when I got this photo and lovely note from one of my customers a few days later, she said:
You have no idea how much my little Ella LOVES her loopy doll. She loves snuggling with it frequently! Here they are the night of Spring Ba Da Bing...sound asleep.

My hubby made these modular plywood trees and little houses as displays for the dolls and puppets. I'm so happy with how they came out. Hoooray! I am super stoked that the crazy octopus Loopy, Deer boy, and most of the finger puppets sold.


Saturday, April 11, 2009

I've Been Crafting! Big Craft Show Coming Up!


In anticipation of warmer weather; here is a preview of the aquatic Loopydolls that I have been busy making. They will be exhibited and for sale for the first time on April 19th at Plant 0 in Richmond Virginia 11am-5pm. 


Wednesday, April 8, 2009

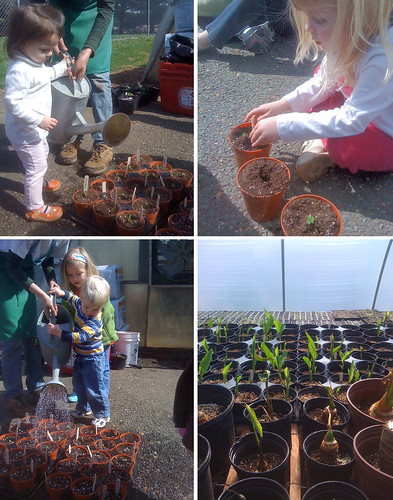
Visit to a Greenhouse: Planting seeds and Transplanting Plants with Children


Last week's visit to the Charlottesville City Parks and Recreation landscaping center went swimmingly thanks to Lori Hall, one of the head landscapers for the city. Lori gave us a tour of the greenhouse where all sorts of seedlings were bursting to life. These plants will foliate Charlottesville's twenty or so public parks. Some of the plants, such as the tomatoes were 'indicator plants' to make sure that the conditions in the greenhouse were just right.

After the tour Lori brought out huge buckets of potting soil and I provided the little shovels. The children got right to filling up there flower pots. Gathering around in a circle with our pots before us, Lori has us put a little hole in the middle of the dirt for our seed to go. She then passed around tomato seeds and marigold seeds. We labeled our plants with wooden tags and permanent marker.  After that the kids got to take turns watering with the big watering can. The next round of activity involved transplanting basil plants, once again labeling and watering. The plants will be kept in the greenhouse for four weeks, after which, the children will visit again and be able to take home their fully grown creations. 

A Walk in the Park: Making a Mobile from Pinecones, Sticks, and Seeds


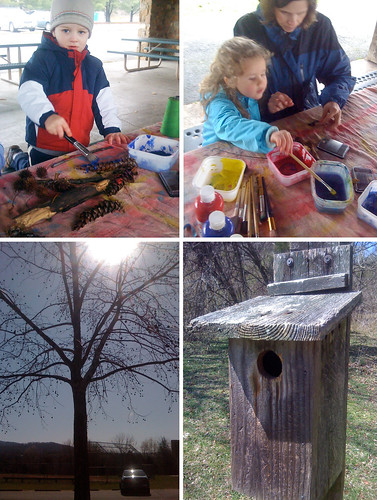
My Charlottesville Parks and Recreation class, 'Parent and Me Nature Explorers', has begun for the spring season. The classes are off to a great start. In the above photos we are at Pen Park. As the children and parent gathered at the picnic shelter, I had paper lunch bags, markers and alphabet stamps set up for the children to decorate their 'collection bags'. With bags in hand, we took a pleasant fifteen minute walk through a meadow and woods where we collected pinecones, sycamore seeds, leaves, and sticks. Back at the picnic shelter we painted our nature artifacts with washable tempera paint. Children used the toddler scissors to cut lengths of string. Parents helped tie the pinecones and seeds to the sticks. I was very impressed with their creations: beautiful nature mobiles. Pictures of the mobiles will be coming soon!


Wednesday, April 1, 2009

Class#6 Mangham Manor Wool and Mohair Farm Visit

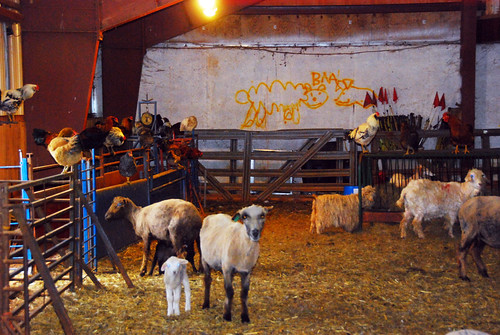
Last Thursday was the grand finale class of the Adventures with Mimi series. We visited the Mangham Manor Wool and Mohair Farm. It is now prime lambing season, so we got to feed dozens of week old lambs and kids. The hungry little lambs ran to us with wagging tails, they were so delightful. Michele gave us a tour of the massive barn and introduced us to all her favorite ewes; one named Coco, she has had for over 20 years. We even got to watch her shear a angora goat, which was a very intense experience, but at the end the goat lightly sprang away with its new haircut. Mangham Manor is a great place to take children to introduce them to the origins of fibers that we wear and use everyday. The wool makes such an elaborate journey from sheep, to washing, to carding, to spinning, to knitting, to store, to our backs. Michele even showed us her warehouse of yarns and hand knitted and felted goods that you can buy online, at markets, and in stores. She even has mohair socks made from her yarns! Michele was so kind and generous to give the children little samples of the wool and mohair products in different stages of production. What a wonderful experience!

Library Gem- Charlie Needs a Cloak 
After the tour I read to the children a very appropriate book called Charlie Needs a Cloak by Tomie de Paola. They enjoyed it so much, they had me read it twice! Charlie is a shepherd boy with a tattered red cloak. He shears his sheep and goes through the whole laborious process of washing, carding, spinning, weaving, and sewing in order to make a fresh new cloak. The pictures are very amusing with mischievous sheep on every page, making life just a bit more challenging for poor Charlie. This story is the perfect pairing for any lesson about sheep farming and wool.


Tuesday, March 24, 2009

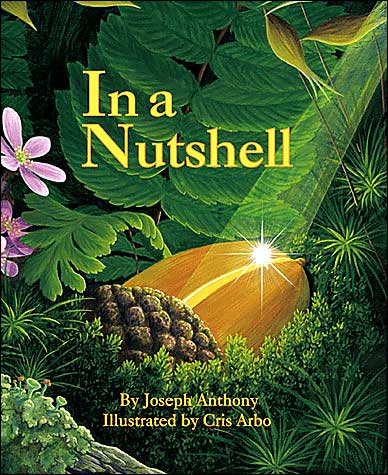
A Library Gem- 'In A Nutshell'

I found some great books at the library this week while browsing through the stacks. I plan to review some of them and I'll let you know how the kids respond to them. Today I enjoyed reading a very special book to kids in my Parent and Me Nature Explorers class at Pen Park.

Whenever I pick up a book from the children's book publisher Dawn Publications, I know I am in for an educational, earth loving treat. The book In a Nutshell by Joseph Anthony and Cris Arbo really takes my breath away. It details the entire life cycle of an acorn. The nut falls from an oak tree and survives many perilous situations as it sprouts and grows into a huge tree that is enjoyed by animals and humans alike. It dies, turns to soil, and delicious things grow from that soil that become part of us all. The story is deep, yet thoroughly enjoyable to read and with amazing illustrations. The children enjoyed pointing out recognizable plants and animals. I could see this story being read again and again because it is so rich.

Friday, March 20, 2009

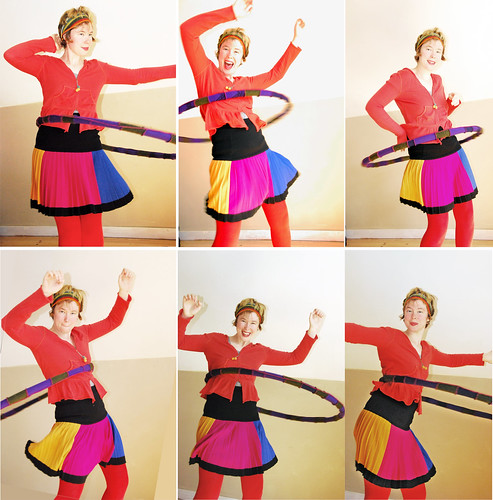
Hula Hooping: Fun for Kids and Adults Alike


I have made many large adult size hula hoops, which make great exercise devices.  I often use them in my kids classes as well. Although they are too large for young children to actually hoop with they are great for many other activities both physical and mental.  

  • Defining a Space: Put the large hoop in the grass and observe the natural world within it. when you look carefully or with a magnifying glass you see so many types of plants, minerals, and insects all within such a small space.  
  • Burn off Some Extra Energy: Have the children roll the hoop down a hill. They make the hoops race or try to aim them at a target. They are big round objects, but not terribly heavy, so young kids can get a great workout and have a blast dragging the hoops back up the hill all by themselves. I often play this game if the kids seem really hyper and I need them to be calm and focused for a craft project. 
  • Make an Obstacle Course: Jump from hoop to hoop, jump through the hoops, toss objects into the hoops, etc...
  • Round and Round: Toddlers like to try to hula hoop, so hold the large hoop for them let them spin around while you spin the hoop around them.
  • Hoop for Entertainment: With some practice, you can get quite proficient at Hula Hooping and learn some impressive tricks, such as 'the lift' or hoop several hoops at once. The large adult size hoops are much easier to do that the small light ones found at toy stores. Don't be shy, give it a try! And put on an entertaining show for the kiddies!

How to Build Your Own Hula Hoop:

All the materials you need can be found at a hardware store and will cost you about $35 and provide enough material to make 9 adult size hoops.

You Need:

  • a PVC pipe cutting tool
  • 1 roll of 1/2" or 3/4" black irrigation tubing
  • 9 matching couplings
  • Colored electrical tape to decorate your hoop
  1. Shape a length of tubing into a circle of your desired size. Waist high is a good custom size, but you can go larger or smaller. Smaller sizes require you to hoop faster giving a more rigorous workout, while larger sizes let you hoop at a slower speed.
  2. Cut the tube with PVC cutter. You can add some beans or sand at this point, if you want the hoop to be waited or make a sound.
  3. Dip ends into boiling water or heat with a hair dryer to soften and make inserting the coupling easier. Inserting the coupling is the hardest part; you want to get the ends of the tubing as close together as possible. Keep heating and easing the ends together little by little.*
  4. Wrap the hoop all up with tape, try to make the color combo appealing and make it as pretty and smooth as possible.
  5. Hoop Away!!!!

*The hoop pictured above is one that I made and it is covered with serged together felted wool sweaters. I made the cloth tube and then pulled it over the irrigation tubing BEFORE inserting the coupling. The ends were stitched together by hand. I'm quite proud of my nifty invention. If you end up using this idea, please leave a comment and send me a picture!

If you are one of those people who have never been able to hula hoop before, fear not, I used to be one of those people before I discovered BIG HOOPS. I didn't get the hang of it right away, but with some practice and proper instruction, I was soon on my way to hooping paradise.

How to Hula Hoop:

Lets see if I can explain this without an actual demonstration. A key thing to know is it is not a round and round movements with the hips. It is more a back and forth shifting of weight to a perfectly even rhythm. Listening to music while hooping, often helps. With big hoops you don't have to start gyrating right away. Hold the hoop with two hands and give it a strong spin around your waist. Stand still and let the hoop fall to the ground. Did you notice how it went around you several times without you even moving? Now repeat that action, but with one foot slightly in front of the other start shifting your weight back in forth to the same rhythm that the hoop is spinning around your torso. Catch it on the second rotation, when the hoop is slightly behind you, then you move forward to catch it, forward and back, forward and back. Good luck and have fun!

Wednesday, March 18, 2009

Class #5: Stamping and Stenciling on Scrap Wood


Last Thursday we had our 5th Adventure with Mimi. We explored nature through art indoors since it was chilly and cloudy out and the chickens were stealing our snacks right out of our hands!

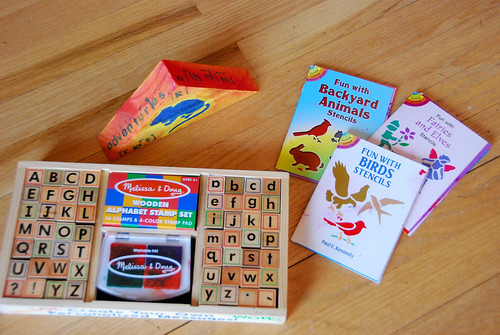
My husband, Jason Roberson, supplied us with a box full of wooden triangles, which were cast-offs from a recent carpentry project. The kids painted the  triangular "mountains" with tempera paints and then stenciled them with various Birds, Backyard Animals, and Fairies and Elves stencils from Dover. They also stamped onto the "mountains" with a Melissa and Doug stamp kit. We lined up all the creations to make a mini mountain range.

The wooden pieces do not need to be primed for this project. The wood takes the tempera paint and stamping very well. If you want to paint wood pieces to use as a toy, I recommend sealing the wood with melted beeswax after painting and stamping. 

CousCous and Quimble: the joys of backyard chicken keeping

Here are Cous Cous (the little one) and Quimble (the big one). They are meeting for the first time and to my pleasant surprise they get along great! The full grown chickens are a little less welcoming, but I will be easing these two into the flock little by little. Every day is an adventure with chickens. Becoming a chicken keeper is one of the best decisions that I have ever made. If anyone reading this blog is interested in getting a backyard flock of their own, I say "do it!". They are fun, useful, and low maintenance pets, not to mention the eggs are phenomenal. I just joined a local Charlottesville organization called C.L.U.C.K (Charlottesville League of Urban Chicken Keepers). Isn't that just the best acronym ever? They have a blog and a facebook page so you can join this lively group of poultry enthusiasts.

Tuesday, March 10, 2009

Snacking and Crafting: How to Make a Birdfeeder- Class #4

We enjoyed deliciously ambient weather last Thursday and I couldn't be more pleased with how the class went. We began outside doing a little "yard work": planting bulbs and digging and raking with child sized tools.  After that we enjoyed some hoola-hoop games on the front lawn. Rolling large hoola-hoops down the hill and then dragging them back up was a good way to expend some energy before sitting down and making a craft project. 

Bird Buffet: a Bird Feeder Tutorial

What you need:

  • pipe cleaners
  • Cheerios breakfast cereal
  • Birdseed
  • popcorn
  • Tahini thickened with flour 
  • pinecones
  • blunt needles
  • string
  • cardboard or thick paper

1) Begin by having the children thread the cheerios through the pipe-cleaners. 

2) Twist ends of pipe cleaners together to make a ring. You can link together several rings if you'd like.

3) Use blunt needle and thread and carefully thread through some pinecones (ages 5+). Attach pinecone decoration to cheerio ring.

4) Paint on tahini mixture all over the entire piece. It make a glue for  the birdseed and the popcorn. Peanutbutter can be used here, but tahini (sesame paste) makes a good peanut substitute.

5)  Allow to dry on the cardboard for 2 hours and then hang the feeder from a nearby tree. Watch the birds enjoy the buffet!

Seed Starting and Swapping

Two weeks ago my friends Alp and Ingrid hosted a Seed Swap Party. It was so cleverly organized. Everyone brought their seeds and there were little baggies to put them into for trading. I now have the most eclectic mix of seeds and a compendium of knowledge about gardening from my green-thumbed friends. A seed swap is a great way to get heirloom varieties and learn what does well in your area.

Now my little seedling are starting to sprout; it is a very exciting time. I made all their little starter pots out of recycled newspaper using this nifty little wooden gadget called a Pot Maker. I used Fox Farm brand potting soil which contains earthworm castings and bat guano.

Wednesday, March 4, 2009

Class #3- Fun with Eggs!

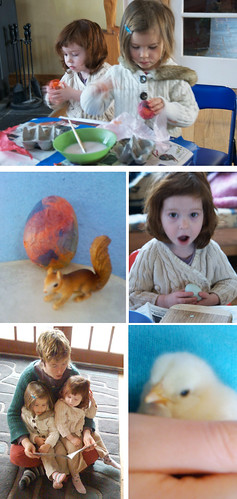
Last Thursday we had our third Adventures with Mimi class at my home. Everyone gathered outside the chicken coop where there were hard-boiled eggs from my chickens to snack on. The children enjoyed peeling the eggs themselves. Next they got to gather eggs from the coop and feed the chickens some cracked corn and yogurt, yum!

Inside I demonstrated the strength of an egg-shell. What you do is hollow out four eggs and put the halves on a flat surface, you can then put several very heavy books on top of the four shells without them breaking. Even though the shell are thin the shape of the dome of the egg is structurally sound. This allows the mother hen to sit right on her eggs for 22 days straight.

At the end of the class the children had two books to choose from: an Egg is Quiet by Aston and Long or So Happy by Henkes and Lobel. They chose So Happy because of its breathtaking Van Gogh-like  illustrations.

Tutorial: How to Make Egg Shakers

We made egg shakers for our craft project. Here's what you need: eggs, strong tape, colored tissue paper, lentils, spoons, brushes, and white glue diluted with water. 

1) Have an adult put a small hole with a sterilized nail into the egg and open the hole until you are able to shake out the insides. Save the insides for later to make an omlett. Rinse out emptied shell and pat dry.

2) Use a teaspoon to half fill the egg shell with dried lentils.

3) Cover hole up with masking tape.

4) Cover egg completely with white glue and water mixture. You can brush it on or dip the egg into the mixture.

5) Rip pieces of colored tissue paper and smooth them onto the egg. You can keep adding glue and paper, layering and smoothing carefully as not to crush the egg. 

6) Leave the now colorful egg overnight to dry. In the morning it will be hardened like paper-maché and you'll have a new musical instrument!

Sunday, February 22, 2009

Happy Sunday!

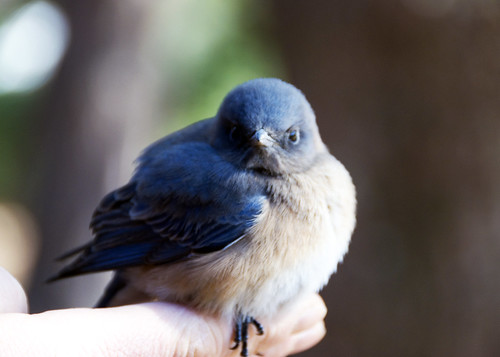
Hello, I hope you had a wonderful weekend! I photographed this little blue bird today. My husband found it trapped in the wood stove in his shop. It stayed on his hand for a good fifteen minutes before it decided to fly off to the nearest branch.