Saturday, April 11, 2009

I've Been Crafting! Big Craft Show Coming Up!


In anticipation of warmer weather; here is a preview of the aquatic Loopydolls that I have been busy making. They will be exhibited and for sale for the first time on April 19th at Plant 0 in Richmond Virginia 11am-5pm. 


Wednesday, April 8, 2009

Visit to a Greenhouse: Planting seeds and Transplanting Plants with Children


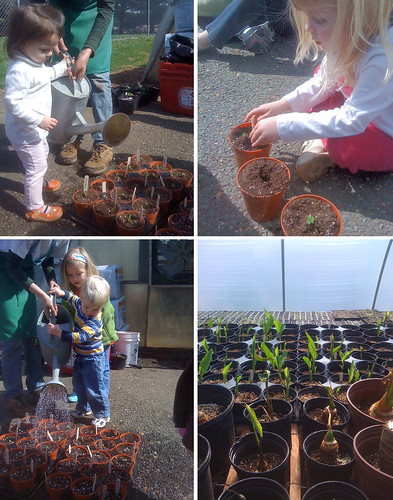
Last week's visit to the Charlottesville City Parks and Recreation landscaping center went swimmingly thanks to Lori Hall, one of the head landscapers for the city. Lori gave us a tour of the greenhouse where all sorts of seedlings were bursting to life. These plants will foliate Charlottesville's twenty or so public parks. Some of the plants, such as the tomatoes were 'indicator plants' to make sure that the conditions in the greenhouse were just right.

After the tour Lori brought out huge buckets of potting soil and I provided the little shovels. The children got right to filling up there flower pots. Gathering around in a circle with our pots before us, Lori has us put a little hole in the middle of the dirt for our seed to go. She then passed around tomato seeds and marigold seeds. We labeled our plants with wooden tags and permanent marker.  After that the kids got to take turns watering with the big watering can. The next round of activity involved transplanting basil plants, once again labeling and watering. The plants will be kept in the greenhouse for four weeks, after which, the children will visit again and be able to take home their fully grown creations. 

A Walk in the Park: Making a Mobile from Pinecones, Sticks, and Seeds


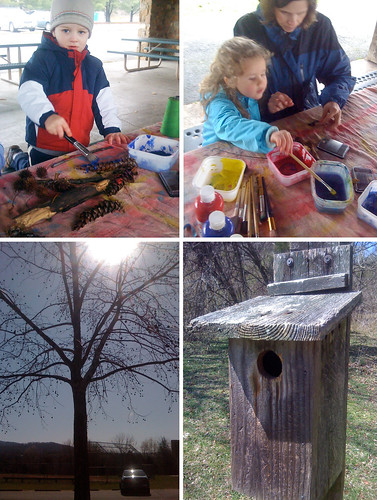
My Charlottesville Parks and Recreation class, 'Parent and Me Nature Explorers', has begun for the spring season. The classes are off to a great start. In the above photos we are at Pen Park. As the children and parent gathered at the picnic shelter, I had paper lunch bags, markers and alphabet stamps set up for the children to decorate their 'collection bags'. With bags in hand, we took a pleasant fifteen minute walk through a meadow and woods where we collected pinecones, sycamore seeds, leaves, and sticks. Back at the picnic shelter we painted our nature artifacts with washable tempera paint. Children used the toddler scissors to cut lengths of string. Parents helped tie the pinecones and seeds to the sticks. I was very impressed with their creations: beautiful nature mobiles. Pictures of the mobiles will be coming soon!


Wednesday, April 1, 2009

Class#6 Mangham Manor Wool and Mohair Farm Visit

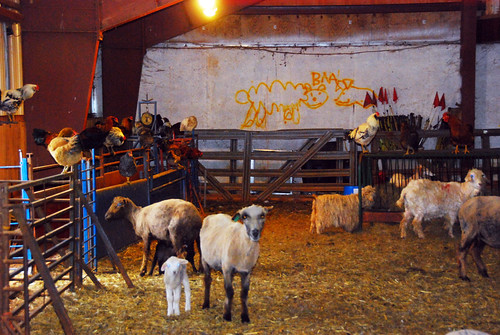
Last Thursday was the grand finale class of the Adventures with Mimi series. We visited the Mangham Manor Wool and Mohair Farm. It is now prime lambing season, so we got to feed dozens of week old lambs and kids. The hungry little lambs ran to us with wagging tails, they were so delightful. Michele gave us a tour of the massive barn and introduced us to all her favorite ewes; one named Coco, she has had for over 20 years. We even got to watch her shear a angora goat, which was a very intense experience, but at the end the goat lightly sprang away with its new haircut. Mangham Manor is a great place to take children to introduce them to the origins of fibers that we wear and use everyday. The wool makes such an elaborate journey from sheep, to washing, to carding, to spinning, to knitting, to store, to our backs. Michele even showed us her warehouse of yarns and hand knitted and felted goods that you can buy online, at markets, and in stores. She even has mohair socks made from her yarns! Michele was so kind and generous to give the children little samples of the wool and mohair products in different stages of production. What a wonderful experience!

Library Gem- Charlie Needs a Cloak 
After the tour I read to the children a very appropriate book called Charlie Needs a Cloak by Tomie de Paola. They enjoyed it so much, they had me read it twice! Charlie is a shepherd boy with a tattered red cloak. He shears his sheep and goes through the whole laborious process of washing, carding, spinning, weaving, and sewing in order to make a fresh new cloak. The pictures are very amusing with mischievous sheep on every page, making life just a bit more challenging for poor Charlie. This story is the perfect pairing for any lesson about sheep farming and wool.


Tuesday, March 24, 2009

A Library Gem- 'In A Nutshell'

I found some great books at the library this week while browsing through the stacks. I plan to review some of them and I'll let you know how the kids respond to them. Today I enjoyed reading a very special book to kids in my Parent and Me Nature Explorers class at Pen Park.
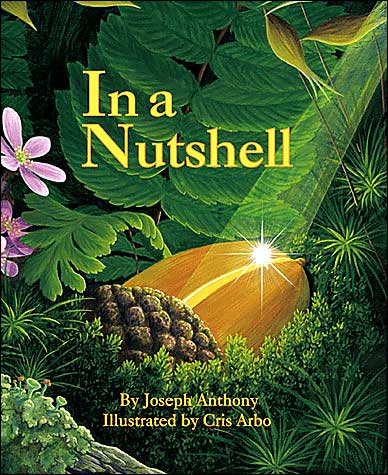
Whenever I pick up a book from the children's book publisher Dawn Publications, I know I am in for an educational, earth loving treat. The book In a Nutshell by Joseph Anthony and Cris Arbo really takes my breath away. It details the entire life cycle of an acorn. The nut falls from an oak tree and survives many perilous situations as it sprouts and grows into a huge tree that is enjoyed by animals and humans alike. It dies, turns to soil, and delicious things grow from that soil that become part of us all. The story is deep, yet thoroughly enjoyable to read and with amazing illustrations. The children enjoyed pointing out recognizable plants and animals. I could see this story being read again and again because it is so rich.

Friday, March 20, 2009

Hula Hooping: Fun for Kids and Adults Alike


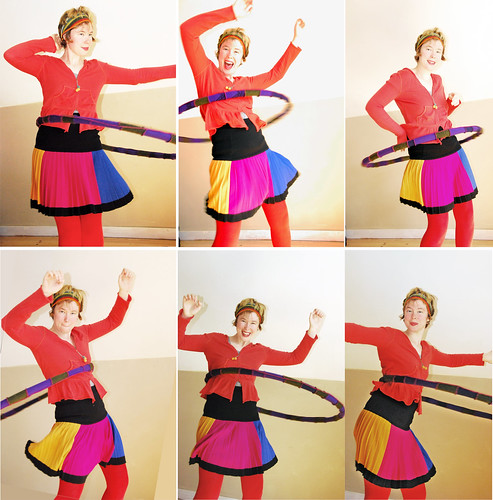
I have made many large adult size hula hoops, which make great exercise devices.  I often use them in my kids classes as well. Although they are too large for young children to actually hoop with they are great for many other activities both physical and mental.  

  • Defining a Space: Put the large hoop in the grass and observe the natural world within it. when you look carefully or with a magnifying glass you see so many types of plants, minerals, and insects all within such a small space.  
  • Burn off Some Extra Energy: Have the children roll the hoop down a hill. They make the hoops race or try to aim them at a target. They are big round objects, but not terribly heavy, so young kids can get a great workout and have a blast dragging the hoops back up the hill all by themselves. I often play this game if the kids seem really hyper and I need them to be calm and focused for a craft project. 
  • Make an Obstacle Course: Jump from hoop to hoop, jump through the hoops, toss objects into the hoops, etc...
  • Round and Round: Toddlers like to try to hula hoop, so hold the large hoop for them let them spin around while you spin the hoop around them.
  • Hoop for Entertainment: With some practice, you can get quite proficient at Hula Hooping and learn some impressive tricks, such as 'the lift' or hoop several hoops at once. The large adult size hoops are much easier to do that the small light ones found at toy stores. Don't be shy, give it a try! And put on an entertaining show for the kiddies!

How to Build Your Own Hula Hoop:

All the materials you need can be found at a hardware store and will cost you about $35 and provide enough material to make 9 adult size hoops.

You Need:

  • a PVC pipe cutting tool
  • 1 roll of 1/2" or 3/4" black irrigation tubing
  • 9 matching couplings
  • Colored electrical tape to decorate your hoop
  1. Shape a length of tubing into a circle of your desired size. Waist high is a good custom size, but you can go larger or smaller. Smaller sizes require you to hoop faster giving a more rigorous workout, while larger sizes let you hoop at a slower speed.
  2. Cut the tube with PVC cutter. You can add some beans or sand at this point, if you want the hoop to be waited or make a sound.
  3. Dip ends into boiling water or heat with a hair dryer to soften and make inserting the coupling easier. Inserting the coupling is the hardest part; you want to get the ends of the tubing as close together as possible. Keep heating and easing the ends together little by little.*
  4. Wrap the hoop all up with tape, try to make the color combo appealing and make it as pretty and smooth as possible.
  5. Hoop Away!!!!

*The hoop pictured above is one that I made and it is covered with serged together felted wool sweaters. I made the cloth tube and then pulled it over the irrigation tubing BEFORE inserting the coupling. The ends were stitched together by hand. I'm quite proud of my nifty invention. If you end up using this idea, please leave a comment and send me a picture!

If you are one of those people who have never been able to hula hoop before, fear not, I used to be one of those people before I discovered BIG HOOPS. I didn't get the hang of it right away, but with some practice and proper instruction, I was soon on my way to hooping paradise.

How to Hula Hoop:

Lets see if I can explain this without an actual demonstration. A key thing to know is it is not a round and round movements with the hips. It is more a back and forth shifting of weight to a perfectly even rhythm. Listening to music while hooping, often helps. With big hoops you don't have to start gyrating right away. Hold the hoop with two hands and give it a strong spin around your waist. Stand still and let the hoop fall to the ground. Did you notice how it went around you several times without you even moving? Now repeat that action, but with one foot slightly in front of the other start shifting your weight back in forth to the same rhythm that the hoop is spinning around your torso. Catch it on the second rotation, when the hoop is slightly behind you, then you move forward to catch it, forward and back, forward and back. Good luck and have fun!
Wednesday, March 18, 2009

Class #5: Stamping and Stenciling on Scrap Wood


Last Thursday we had our 5th Adventure with Mimi. We explored nature through art indoors since it was chilly and cloudy out and the chickens were stealing our snacks right out of our hands!

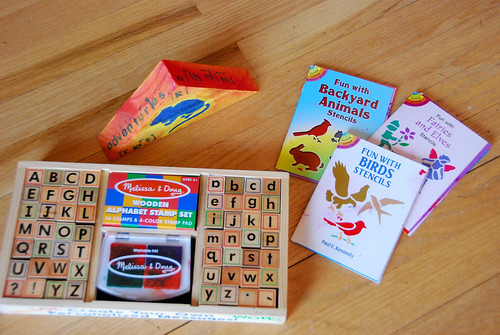
My husband, Jason Roberson, supplied us with a box full of wooden triangles, which were cast-offs from a recent carpentry project. The kids painted the  triangular "mountains" with tempera paints and then stenciled them with various Birds, Backyard Animals, and Fairies and Elves stencils from Dover. They also stamped onto the "mountains" with a Melissa and Doug stamp kit. We lined up all the creations to make a mini mountain range.

The wooden pieces do not need to be primed for this project. The wood takes the tempera paint and stamping very well. If you want to paint wood pieces to use as a toy, I recommend sealing the wood with melted beeswax after painting and stamping.